I really like beautiful things, especially connected to my IDE or, generally speaking, to my work environment. I believe that all neat colors and clean design really facilitate our work. This is the reason, why I would like to focus today on making the terminal beautiful.
This is what I achieved so far:
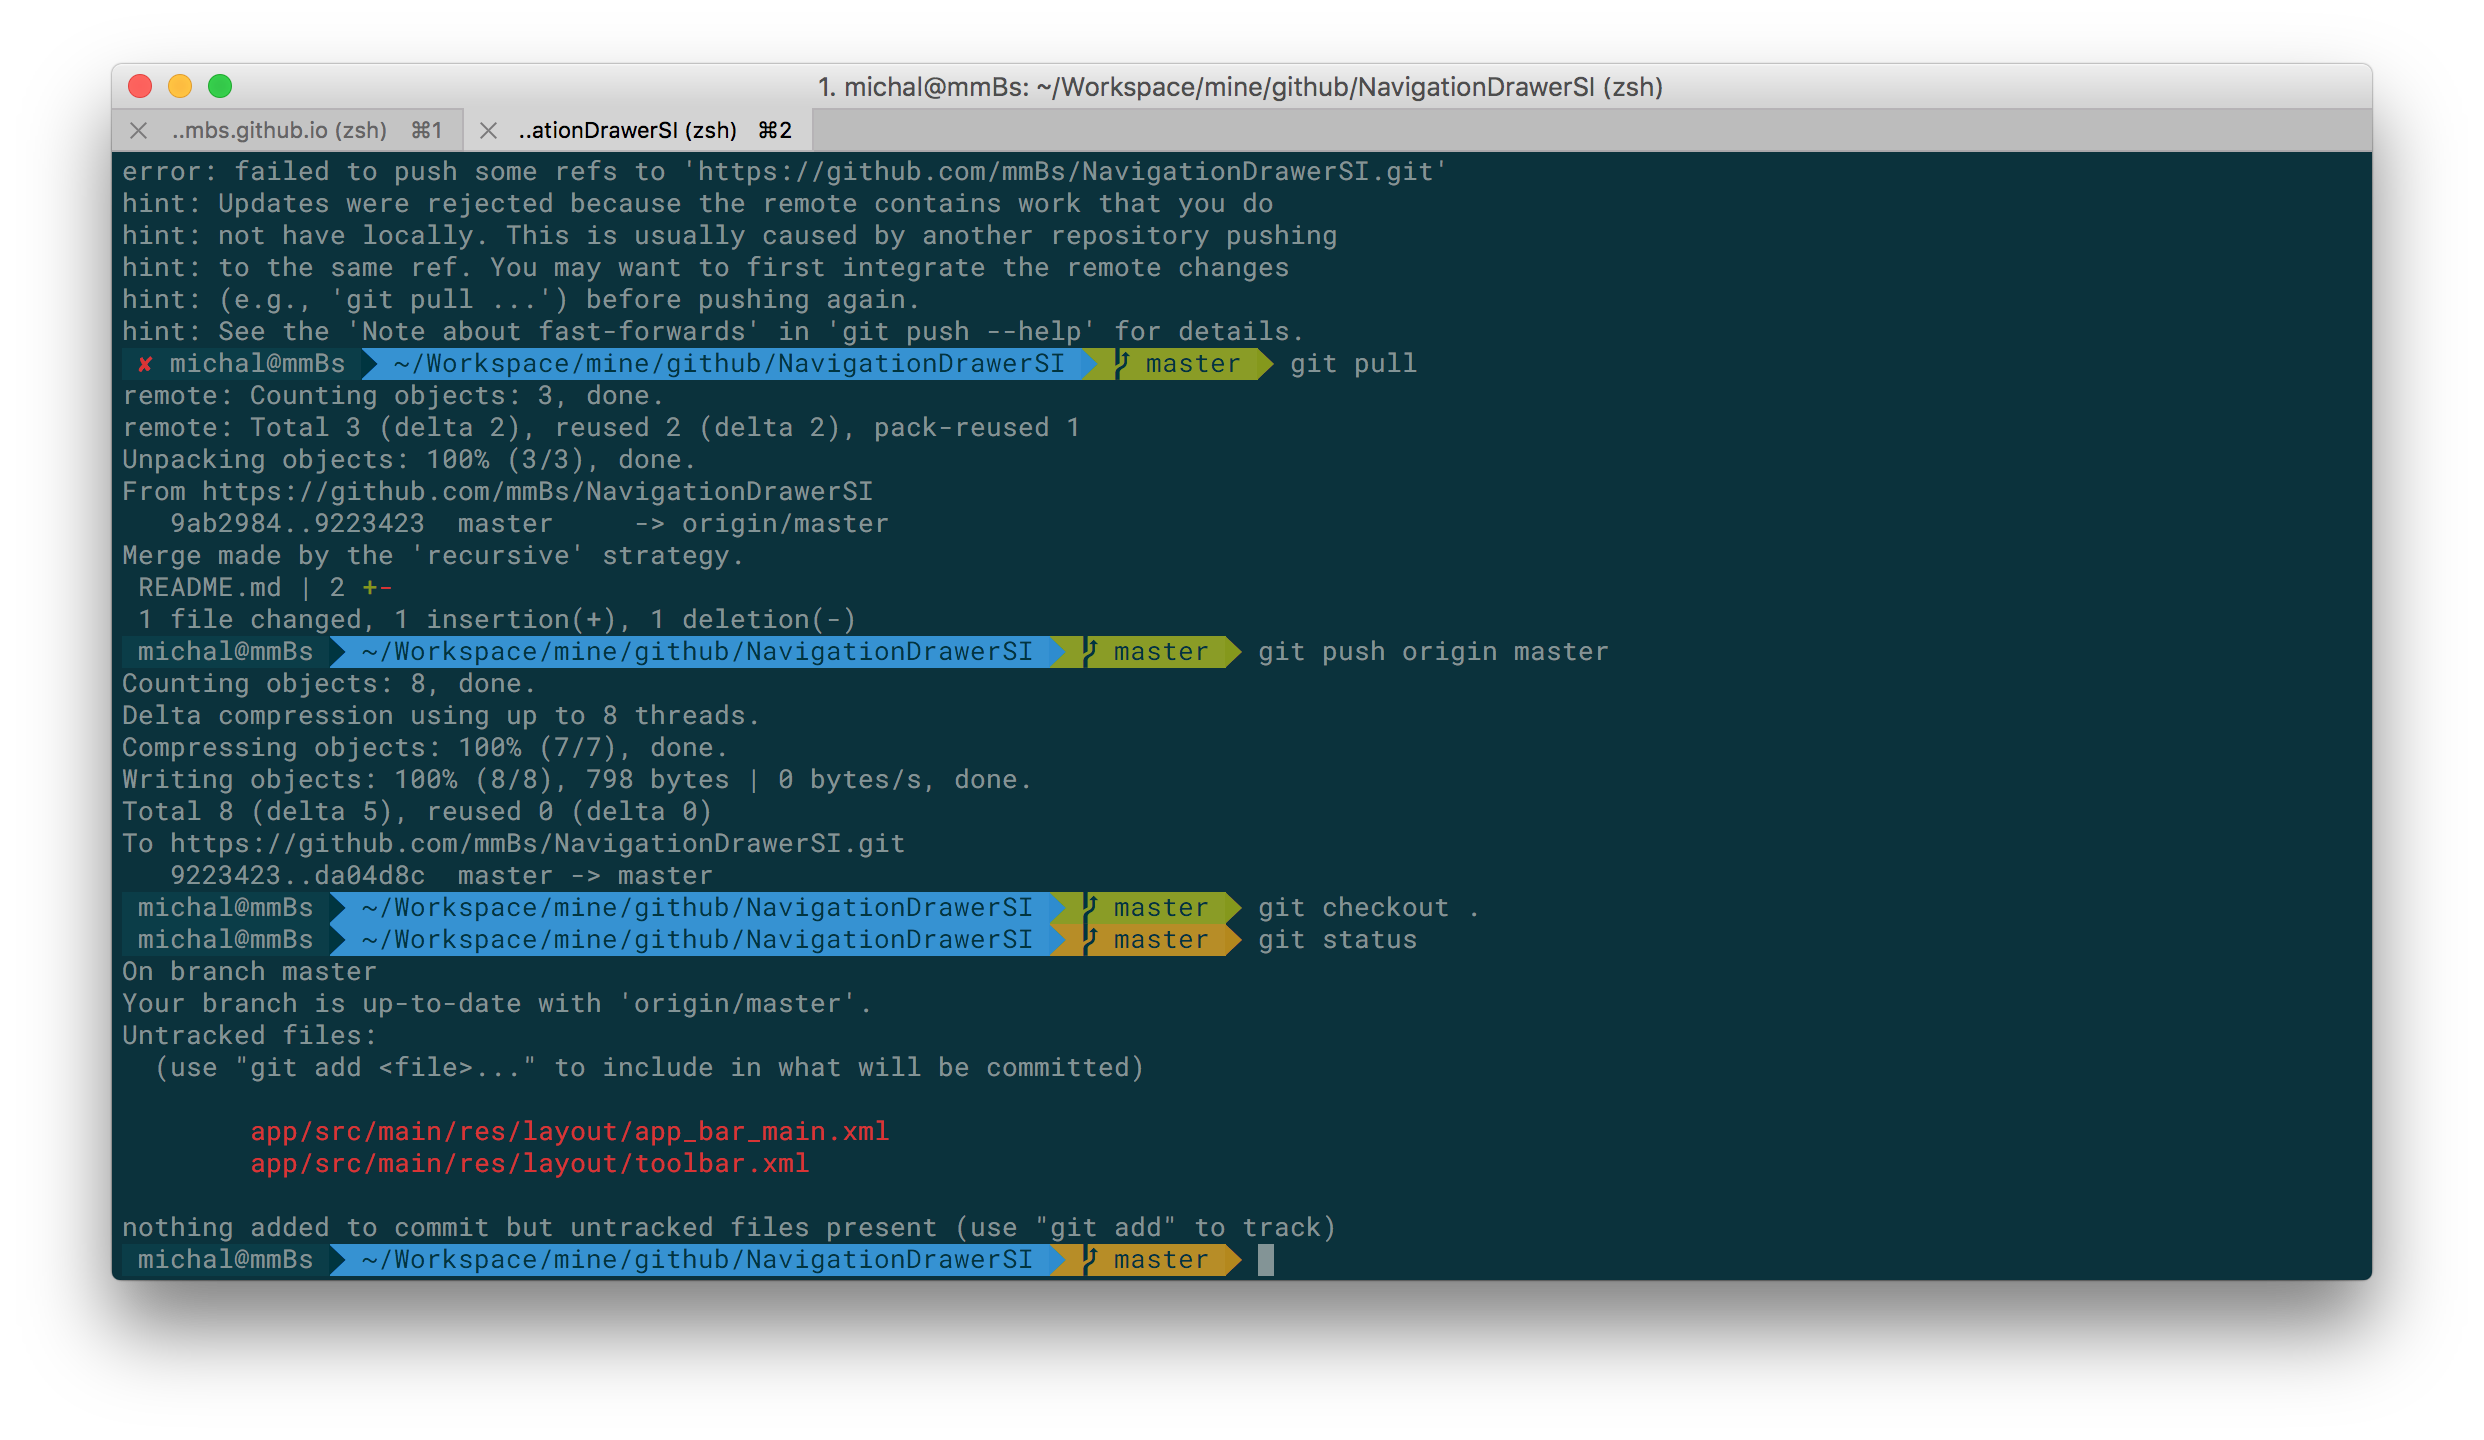
I would like to keep this post as simple as possible, so please find all steps you need to take below.
Manual
- Install the latest version of iTerm2 terminal.
- Check if you have zsh already installed on your machine:
zsh --version.- If no, install zsh using e.g.
homebrew,
if yes, you need to check your version and update to the newest one.
How to do that? This tutorial covers it in a great manner. However, for the purposes of this article, I would like to list the main steps 1: - Check the location of zsh:
which zsh - Confirm the shell that’s set for your user:
dscl . -read /Users/$USER UserShell - Upgrade zsh with homebrew:
brew install zsh - Confirm brew’s zsh location:
ls -la /usr/local/bin/zs*orbrew listorbrew info zsh - Replace zsh to brew’s one:
sudo dscl . -create /Users/$USER UserShell /usr/local/bin/zsh - Restart your terminal.
- Check again the version of zsh:
which zsh - Confirm you use brew’s zsh:
dscl . -read /Users/$USER UserShell - You should be done :)
- If no, install zsh using e.g.
- Install Oh My ZSH! using curl:
sh -c "$(curl -fsSL https://raw.github.com/robbyrussell/oh-my-zsh/master/tools/install.sh)"
or wget:sh -c "$(wget https://raw.github.com/robbyrussell/oh-my-zsh/master/tools/install.sh -O -)" - Change a default theme from robbyrussell to agnoster. To do that you need to set
ZSH_THEMEto the name of the theme in your~/.zshrc. Here you can find a list of preinstalled themes. - To set up the same font I have, first of all, you need to install Meslo and Roboto font from powerline fonts. Just clone them and use
.install.shscript. Then change the fonts in iTerm2 preferences (cmd + ,) like it is shown in the picture below: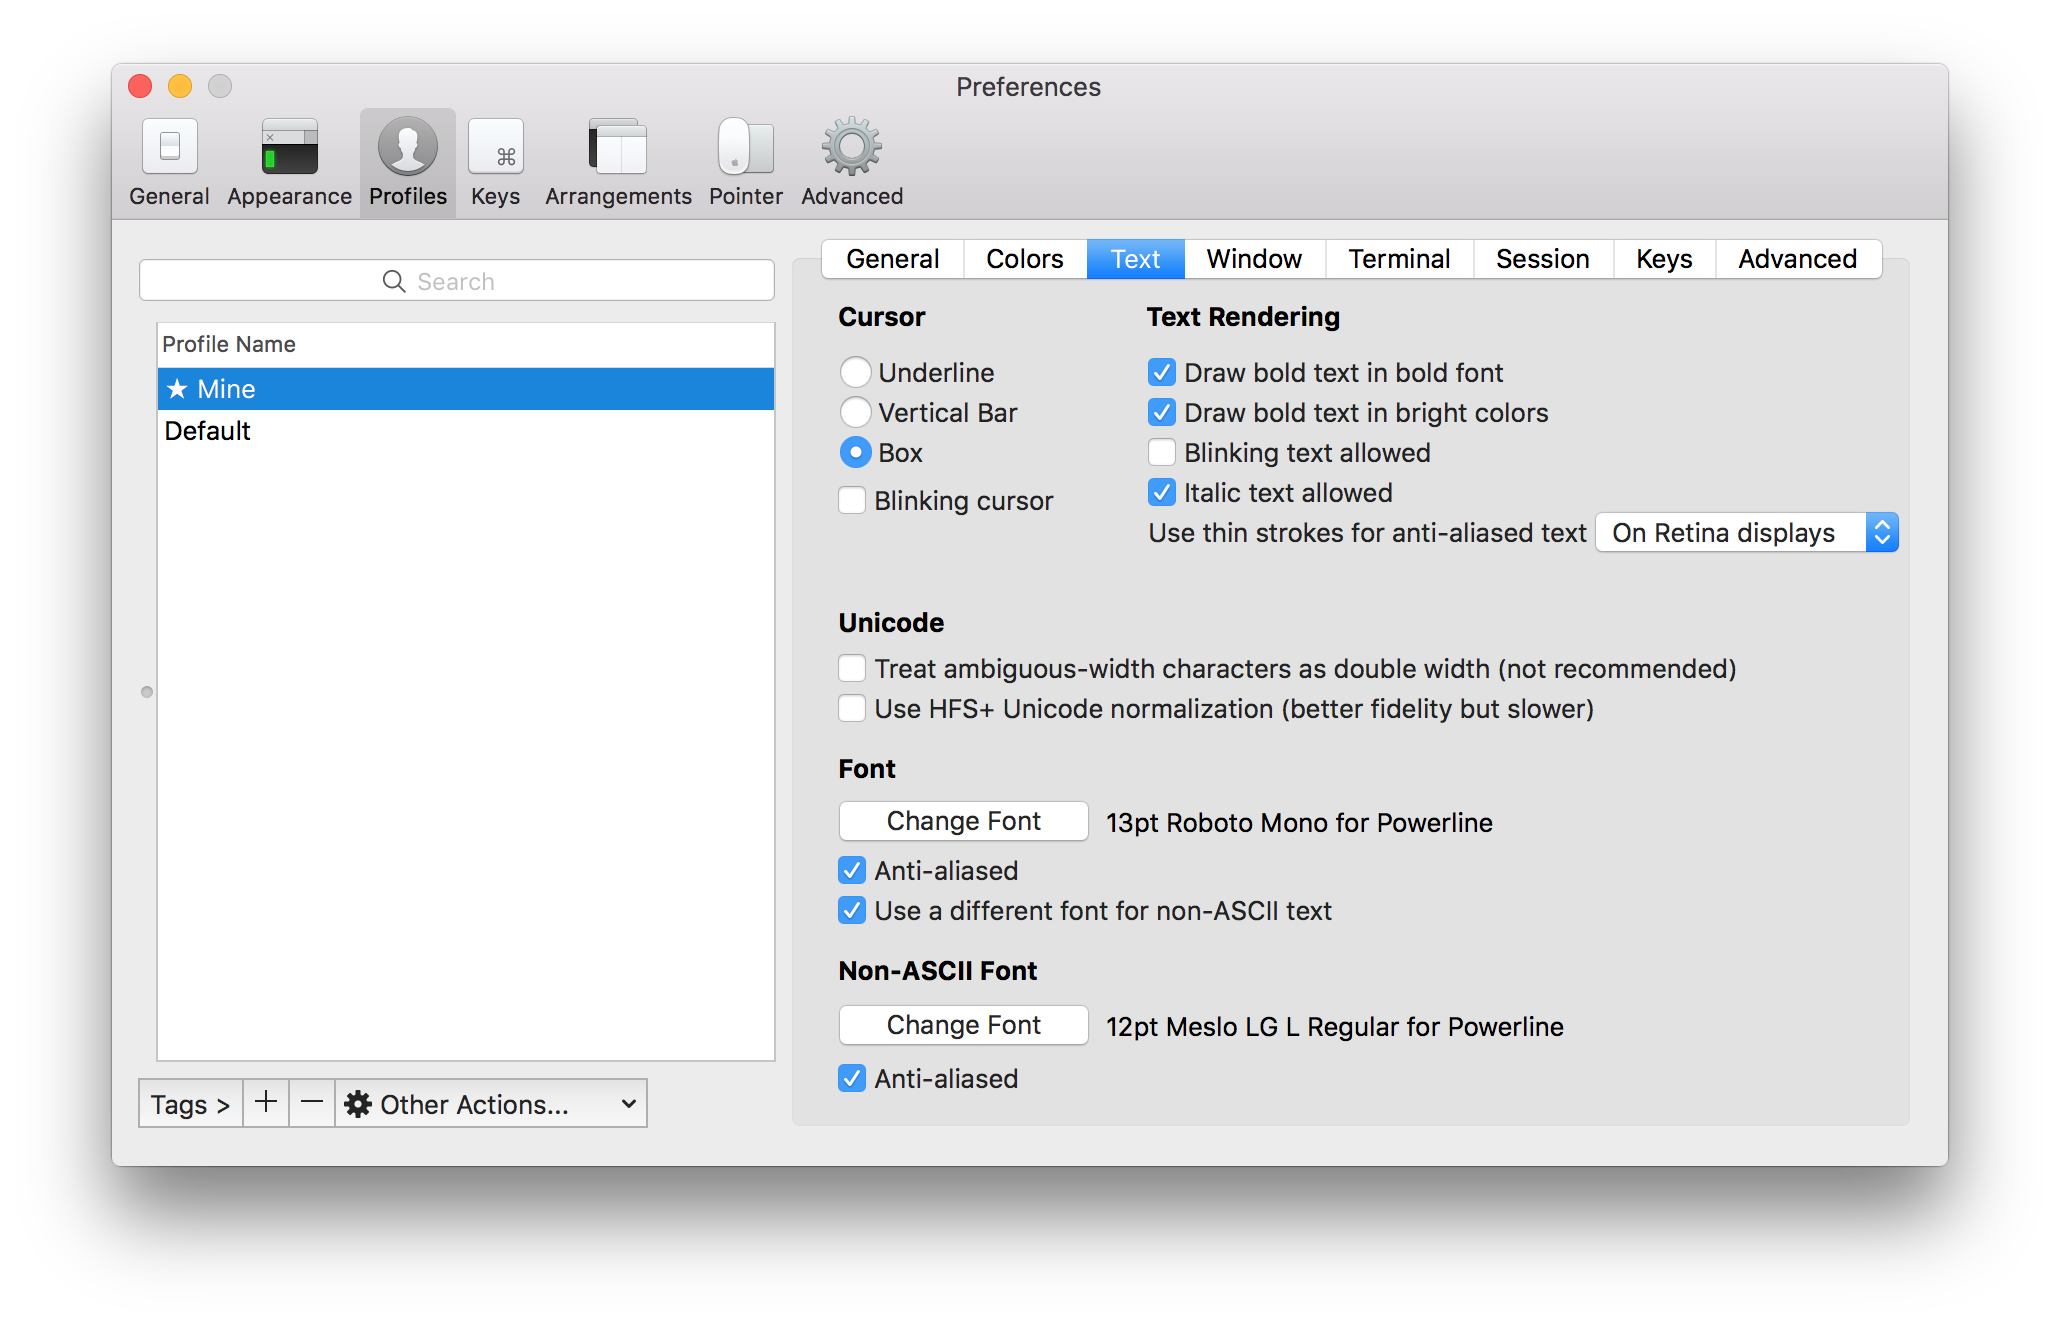
- In a colors tab (iTerm2 preferences) set up color presets to
Dark Solarized. You can find a lot of themes here. - To activate plugins (e.g. git plugin) you need to update this line in
.zshrcfile:plugins=(git bundler osx rake ruby). - That’s it, you’re done! :)
Explanation
You may ask, why I need to install zsh and use it instead of bash? In fact, you don’t need to. But zsh gives you a lot of improvements out of the box:
- Great prompt,
- amazingly quick and smart auto completion,
- spelling correction,
- support of many great plugins (especially for git),
- a really quick configuration with oh-my-zsh,
- many many more.
If you want to go deeper into discussion or gather more information about oh-my-zsh, you can visit Quora. What is more, here you can find a comparison between bash and zsh.
I hope the article is helpful. Please let me know about your thoughts.
Update Nov 22, 2016: On the top of my article you can use great tips from Mastering the Terminal side of Android development.
Useful links
-
These steps come from Rick Cogley’s blog ↩